Author Topic: DIY Radio tray  (Read 30958 times)

EI1638

  • Newbie
  • *
  • Posts: 131
    • View Profile
DIY Radio tray
« Reply #30 on: May 05, 2015, 21:51:04 PM »
After Fred posted about the Quark Micro plans being available on the jivaro_models.org website I thought it'd been a while since I'd checked Jivero out.

Bad move, there, under 'Technique' was something that had been eating me for a while - yet another tranny tray, but this time for 'standard' Futaba transmitter.

The drawings here are for a perspex tray to suit a Turnigy transmitter

http://www.jivaro-models.org/pupitre/page_pupitre.htm

I'd already made an attempt at putting one together, but the 3D modelling was not a success, I couldn't reach the switches on the front of the transmitter with anything resembling comfort. Much hacking of cardboard later I gave up. I'd obviously not consumed enough thinking sauce before I started marking out my cardboard


Not pretty.

I printed out the Jivaro drawings and started 3D modelling (in cardboard again). Some cuts, nicks later I ended up with this, with plenty of scribbled adjustments to the original drawings:


OK, I was never going to use perspex, so my target material was 3 mm ply. Fret saw and sander located, dust blown away, new set of marked up drawings stuck to my scraps of plywood and I was off. Adhesive was mitre bond, as per the last one (only this time it was thick, not medium...) and after 3 coats of sanding sealer, a light sanding and some primer and paint I ended up with this.


 8) Sits right and feels right.

I have misgivings about the neck strap, but for this tranny a flight never lasts much more than 7 minutes anyway, so not likely to be a problem.

Supports held in place with RC car body clips. Neat idea (not mine, sigh)

EI1638

  • Newbie
  • *
  • Posts: 131
    • View Profile
DIY Radio tray
« Reply #31 on: May 23, 2015, 19:08:17 PM »
Yep, this one's a keeper. Most comfortable days power flying I've ever spent.

Now, if only I could make something to improve my flying ....

billscottni

  • ISR Club Member
  • Newbie
  • *
  • Posts: 1459
    • View Profile
    • http://www.nimsa.co.uk ; www.billscott.org.uk
DIY Radio tray
« Reply #32 on: May 23, 2015, 20:02:13 PM »
I use a tray with my 3030, but not with my DX7s and it feels odd without the tray! Need to build one to suit it   :?:

EI1638

  • Newbie
  • *
  • Posts: 131
    • View Profile
DIY Radio tray
« Reply #33 on: May 24, 2015, 13:05:52 PM »
Hi Bill,

That is exactly the way I felt about my Futaba T7C. Compared to my FX20 which is just so comfortable to use the standard tranny just never felt right. A neck strap was slightly better than no strap, but still not right.

The tray just works. It's solid, yet comfortable, and not overly heavy, so after 11 x 7 minute flights yesterday no neck issues, as I've set this one up with a neck strap rather than the "man bra".

I try to set up my gear specifically for the type of models I'm flying. OK, that leaves me with 3 sets of flying kit (CL, gliders, power), but it also means I can't say that I forgot to take something out of whatever kit it was last in - neck strap stays with power flying kit/tranny, "man bra" stays with glider flying kit/tranny etc.

I've now run out of excuses for being a rubbish power flyer.

Chris

EI1638

  • Newbie
  • *
  • Posts: 131
    • View Profile
DIY Radio tray
« Reply #34 on: October 24, 2015, 22:06:16 PM »
Seems every time I go flying people ask me about this tray. I'm regularly asked where I got it, to which I always reply 'I found it in my workshop'.

I've been pointing folk to this thread, so I thought I'd better add some more photos of the finished product, so that construction is as self explanatory as possible.


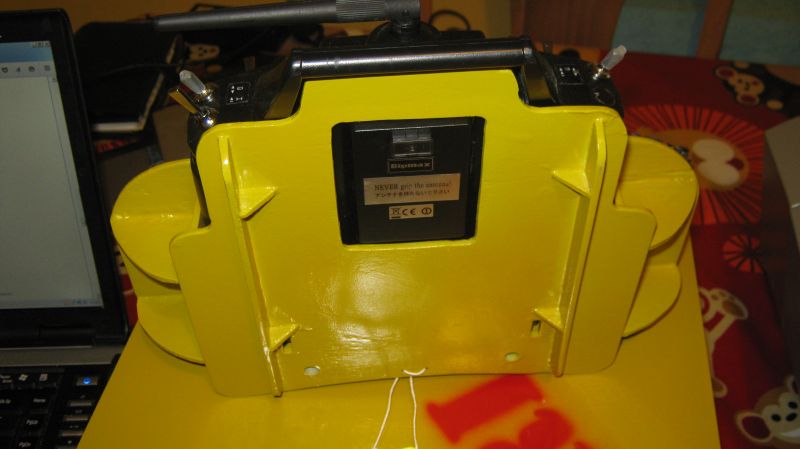
Underside showing runners: I had some scrap lengths of ply so I just rounded the ends and used some more scraps to make triangular gussets to keep everything off the ground. The RF module is clearly visible, sitting snugly in it's cutout, as are the two slots for the battery compartment 'feet'
To make everything solid the tubes I use to locate the harness rods are glued into the top and bottom plates. I think this shot gives a really good idea of how the whole thing was assembled.


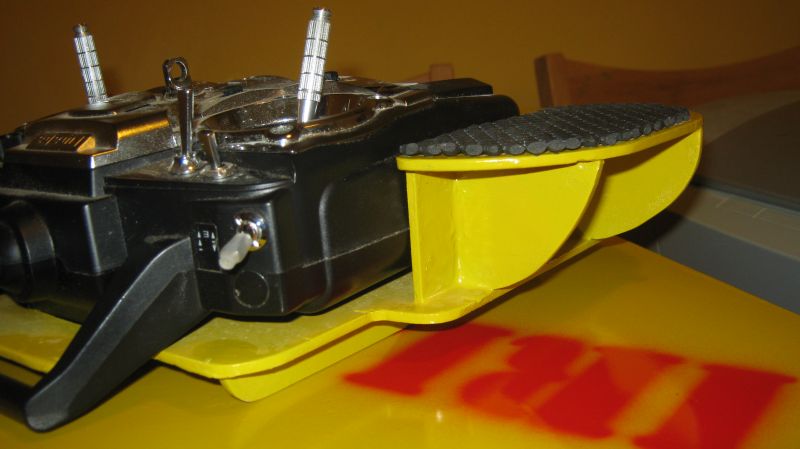
Front quarter, showing curved backplate and front gusset. Neoprene rubber hand 'grips' clearly visible here Not sure if I said already, but placed whilst final clear coat is still wet.


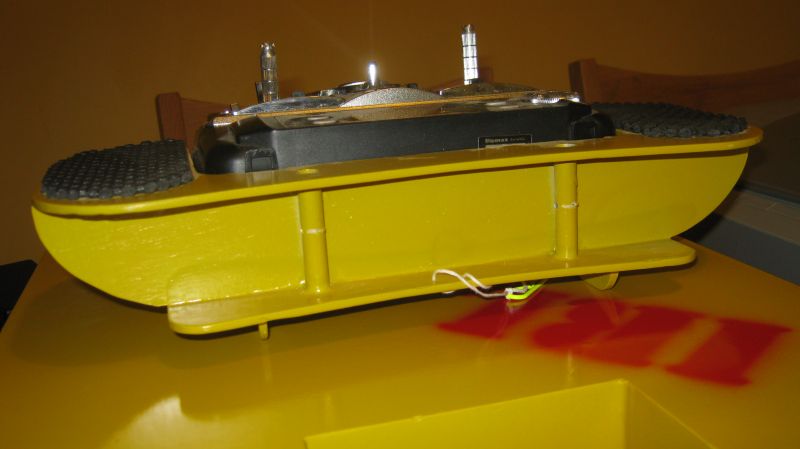
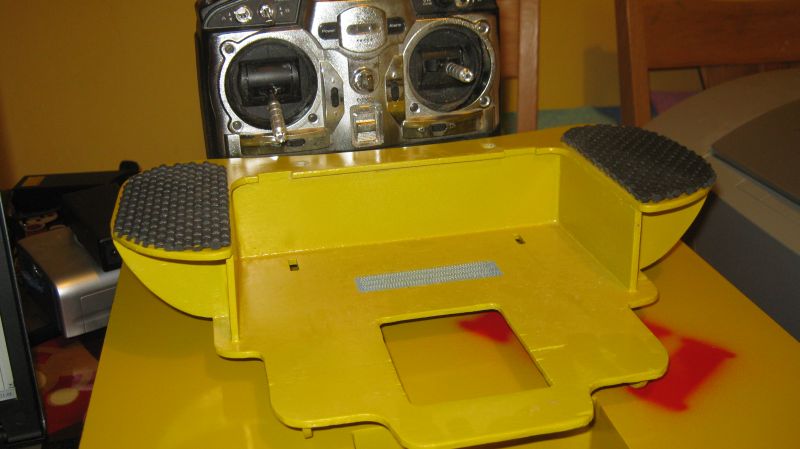
View from the back. Shows backplate and alu tubes that the harness rods slide in to. The string is tied to the two clips I use to hold the harness rods in place - so that I don't lose them when the tranny is not in use.


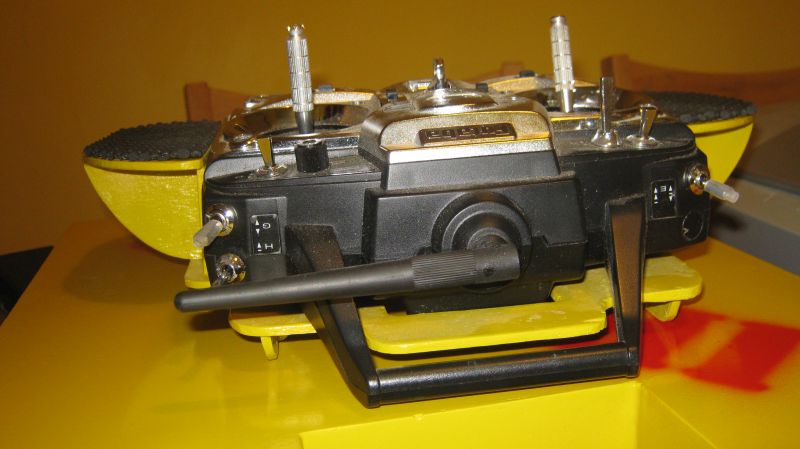
Front view, showing how the integrated tranny handle fits over the bottom front of the tray. Shows front gussets for supporting sides/base from tray top.


The magic velcro that holds the tranny in place. Not a a lot of velcro, but enough to hold the tranny in place when the tray is turned upside down.

Shows the overall shape of the bottom and cutouts for RF module and the feet on the battery compartment lid.

I can't recommend enough making a mockup out of cardboard before cutting timber (or whatever your preferred material is). This guarantees a good fit of the transmitter to the tray.

Since I'm lazy, the joint areas are large, and the transmitter is light, cyano (mitrebond) was used everywhere. A couple of engineers squares come in handy to keep everything aligned whilst the cyano kicks.

Happy Days

  • ISR Club Member
  • Newbie
  • *
  • Posts: 2184
    • View Profile
DIY Radio tray
« Reply #35 on: October 25, 2015, 15:31:07 PM »
A very neat job Chris, for those who don't fly "thumbs up".

Just one question,......where do the batteries go to heat the bits on the side of the tray to keep your little 'pingys' warm on cold days? :lol:

Keith
Try not to run out of airspeed, altitude and ideas....... all at the same time.

EI1638

  • Newbie
  • *
  • Posts: 131
    • View Profile
DIY Radio tray
« Reply #36 on: October 25, 2015, 23:48:30 PM »
But seriously, did you not notice the battery connector and battery straps on the right hand side and the small thumbwheel temperature control just at pinkie level :twisted: