Author Topic: West Wings Skylark build thread  (Read 64116 times)

angry_muppet

  • Newbie
  • *
  • Posts: 165
    • View Profile
West Wings Skylark build thread
« Reply #60 on: October 23, 2015, 08:45:54 AM »
English isn't my strong point... Bear in mind us Northerners speak a different lingo!

What I meant is that of the two supplied plywood control horns, one has gone missing. Thankfully I have additional plastic control horns I ordered with my other supplies. The issue will be affixing them; do I do it before or after covering the aileron? I think afterwards...

Happy Days

  • ISR Club Member
  • Newbie
  • *
  • Posts: 2184
    • View Profile
West Wings Skylark build thread
« Reply #61 on: October 23, 2015, 09:49:50 AM »
Right!, now that we've established what you're saying maybe I, and others, will be able to help you.

Yes the control horns normally go on after covering. However.........
As you'll discover, little plastic horns don't normally come with fixing screws. Knowing that you're new to building I wonder if you have any appropriate size screws?
If you do have some screws;.........Warning! drill a hole through the control surface ( a little smaller than the dia of the screw) BEFORE :shock:  :shock:  you try to put the screw through the wooden frame of the control surface. If you don't you risk splitting the wood as the screw forces it's way through.

If you don't have any appropriate size screws you could probably get away with gluing the horn to the control surface as this build is only a light flyer.
If you do glue it ( thin CA glue is probably best as it will 'wicker' it's way into the wood,) then you'll have to cover the control surface after you've glued the horn in place.

Make sense? :wink:

Keith
Try not to run out of airspeed, altitude and ideas....... all at the same time.

angry_muppet

  • Newbie
  • *
  • Posts: 165
    • View Profile
When your dihedral is anhedral...
« Reply #62 on: December 11, 2015, 19:41:36 PM »
Methinks I have made a mistake in my building...  :!:


I've had a look and either one or both wings are out by 1mm at the third wing rib.   :?:


Yet again, measure, check, measure, check and measure again before gluing!  [-X

Now, my question is, how can I locate the necessary fine ply that is required to manufacture a longer 4.5° wing brace?  Or do I have an alternative as I would consider keeping the wing as a single unit.  Do feel free to advise whether this is foolish...

(And berate for making such a rookie mistake in building)

Finally, I do hope to fly (crash) the glider when the weather gets better... (in 2016)

Happy Days

  • ISR Club Member
  • Newbie
  • *
  • Posts: 2184
    • View Profile
West Wings Skylark build thread
« Reply #63 on: December 11, 2015, 21:04:55 PM »
Not sure what you mean when you say the third rib is 1mm 'out.' Out of what?

I think the most interesting factor is the securing dowels......... They are bending upwards. I suspect the elastic bands are too strong and have snapped the wing joiner.

Can't really make out your second picture. What exactly does it show?

Can you explain exactly what has happened David.
Try not to run out of airspeed, altitude and ideas....... all at the same time.

angry_muppet

  • Newbie
  • *
  • Posts: 165
    • View Profile
West Wings Skylark build thread
« Reply #64 on: December 12, 2015, 14:25:37 PM »
Hi Keith,

What I mean is that it seems that when assembling the wings, the third wing rib is 1mm further towards the wingtip than it should be.  Hence, as you can see from the second picture, the ply joiner doesn't make it to the rib.  I know the picture is fairly poor, but I'll blame the camera...  I'm perfect don't you know! :roll:  That allows the wings to flex and therefore won't hold the dihedral that is required.  Essentially, the wing joiner is about 170mm and the distance between ribs is 172mm... :!:  I think that I can manufacture one from the leftovers from the ply that the wing ribs were cut from.

I'm not sure how I got the positioning of the ribs wrong as I'm convinced that I followed the plans and it'd be relatively difficult not to notice that the rib isn't in the correct place when it's overlaid on the plan during construction...  :?

johnfireball

  • Newbie
  • *
  • Posts: 276
    • View Profile
West Wings Skylark build thread
« Reply #65 on: December 12, 2015, 20:52:46 PM »
Hi David,
           I may be wrong but I would think the ply wing joiner should slot into a box section built into the wing. Did you neglect to sheet over the top and bottom of the intended box? Did you cut the dowels? They should be single pieces across the fuselage.

John.
I have the body of an 18 year old.........I keep it in the freezer

Happy Days

  • ISR Club Member
  • Newbie
  • *
  • Posts: 2184
    • View Profile
West Wings Skylark build thread
« Reply #66 on: December 13, 2015, 08:39:42 AM »
I think John is right David. Wing joiners don't usually come directly into contact with ribs. I think there should be a  'flat sided slot', or 'socket' for the joiner to slide into.

Here's a picture from the plans of one of my old models. (this is from a Spirit Elite) it shows the “socket” that links the first few ribs of a wing half (so spreading the load) and allows the joiner to side into.

Go back to your plans and see if there isn't something similar shown.
(You're not the first person to hit problems with you first build. We've all been to the place where you try fitting the model together and suddenly felt a rather hollow feeling in the pit of our stomachs  :oops:  )

Try not to run out of airspeed, altitude and ideas....... all at the same time.

billscottni

  • ISR Club Member
  • Newbie
  • *
  • Posts: 1459
    • View Profile
    • http://www.nimsa.co.uk ; www.billscott.org.uk
West Wings Skylark build thread
« Reply #67 on: December 13, 2015, 18:18:35 PM »
If it was designed as a one piece wing, it may be that there is no box as the brace would be glued to the spars.

angry_muppet

  • Newbie
  • *
  • Posts: 165
    • View Profile
West Wings Skylark build thread
« Reply #68 on: December 19, 2015, 15:15:10 PM »
It was designed as a split wing; the first three wing ribs had balsa sheeting applied from LE to TE.  The bottom sheet had to be cut flush with the cutout in the rib to insert the joiner.

The joiner can be inserted fine, it's just that it doesn't reach far enough to be supported by the third rib (leftmost W1 in the pic below).  I'll happily live with a 1 piece wing if it makes it easier to fit, strengthen and work with!


rogallo

  • ISR Club Member
  • Newbie
  • *
  • Posts: 1133
    • View Profile
West Wings Skylark build thread
« Reply #69 on: December 19, 2015, 19:04:39 PM »
my twopence worth is that the plan says dihedral brace not wing joiner, i.e. one pience wing.
Spots or no Spots?
Tuff Choice.

Happy Days

  • ISR Club Member
  • Newbie
  • *
  • Posts: 2184
    • View Profile
West Wings Skylark build thread
« Reply #70 on: December 19, 2015, 19:31:15 PM »
Watch this video carefully. Although this modeller has modified his two piece skylark wing to take an extra brace near the LE when I stop frame the image showing the 1st rib it looks to me as the joiner (Dihedral Brace) fits between the upper and lower parts of the main spar.

Your picture of the plan shows the brace to be 172mm long. Half that length equals 86mm and 86mm from the root of the wing will take the brace up to the edge of the third rib.
What I'm saying is that, a) the brace is not supposed to go any further into the wing, and b) the third rib is in the correct place.

If you want to, before you do anything that you might later regret, bring the wing, plans and instruction down to my place and I'll have a look at it.
I've looked on many web sites and I can find no one else who has had a problem with this aspect. With all due respect to you, that fact suggests to me that you've missed something either in the instructions or the plan, David.

https://www.youtube.com/watch?v=F_0sMo88xpk

L:ittle Keith
Try not to run out of airspeed, altitude and ideas....... all at the same time.

angry_muppet

  • Newbie
  • *
  • Posts: 165
    • View Profile
West Wings Skylark build thread
« Reply #71 on: December 21, 2015, 18:26:38 PM »
I might just take you up on that Keith...  It'llprobably be in the new year at this stage.

Looking at that video, it really does look like I did it wrong...  :?  I have to say, the instructions are so incredibly clear I just don't know how I could have got it wrong...  :shock:

johnfireball

  • Newbie
  • *
  • Posts: 276
    • View Profile
West Wings Skylark build thread
« Reply #72 on: December 21, 2015, 22:32:46 PM »
The beauty of balsa construction, anything is fixable.
John.
I have the body of an 18 year old.........I keep it in the freezer

Happy Days

  • ISR Club Member
  • Newbie
  • *
  • Posts: 2184
    • View Profile
West Wings Skylark build thread
« Reply #73 on: December 22, 2015, 08:51:49 AM »
I totally agree with you John, mouldies are fine to look at, and fly well but are a real pain to repair. Personally I try to avoid them :lol:

L. Keith
Try not to run out of airspeed, altitude and ideas....... all at the same time.

angry_muppet

  • Newbie
  • *
  • Posts: 165
    • View Profile
Re: West Wings Skylark build thread
« Reply #74 on: January 16, 2016, 15:10:34 PM »
So, after meeting with Little Keith, I have started modifying/repairing the wing before the plane even gets flown!   :-\

This is what I started with...


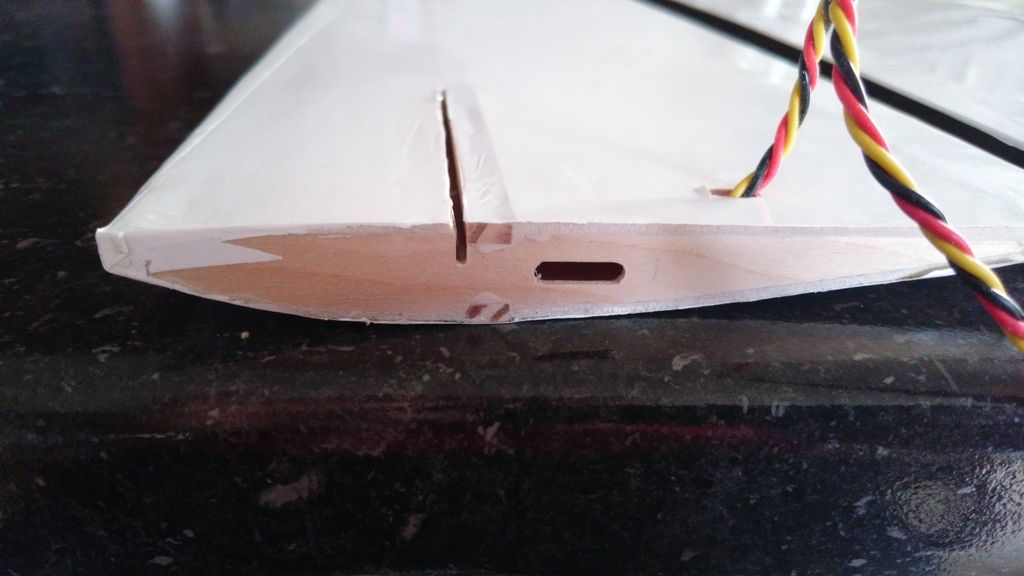
As you can see, the dihedral brace sits proud of the wing rib.  That's what made me assume that the brace needed a cut-out on the underside of the wing.


Unfortunately, doing that (making a cut-out) resulted in THIS...  >:(


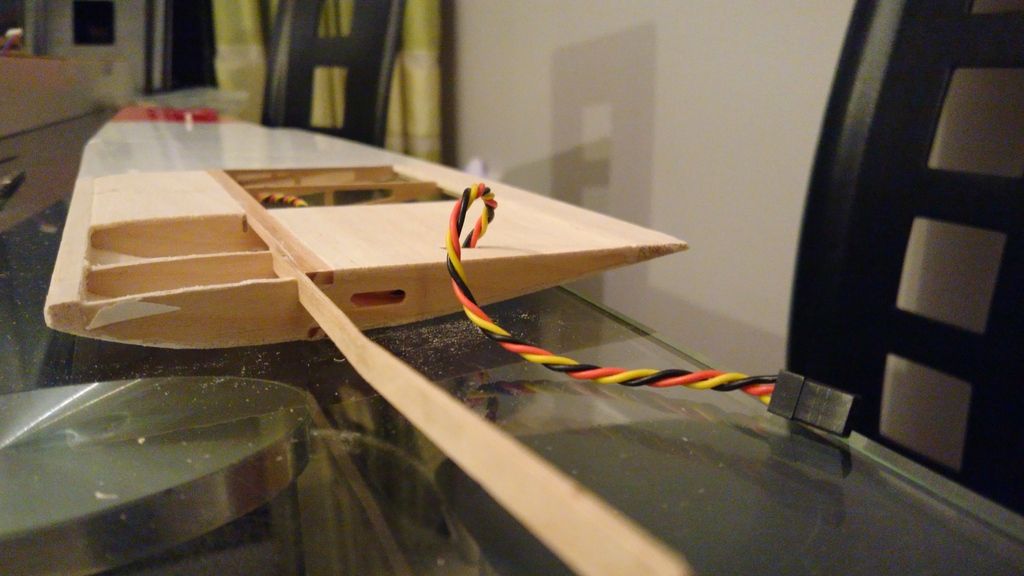
Getting busy with a junior hacksaw blade and a scrap of coarse sandpaper allowed me to deepen the notch in the ribs.


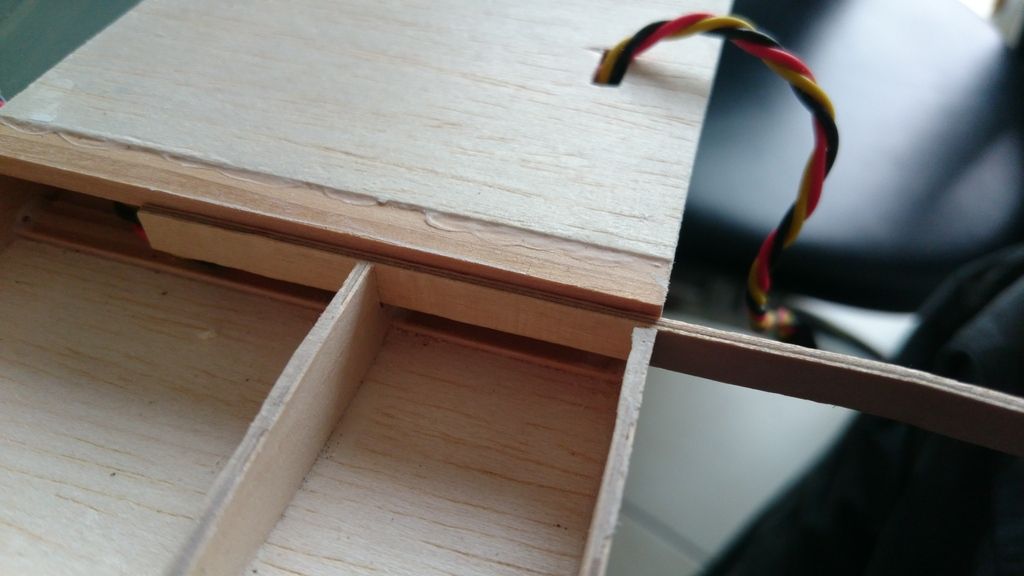
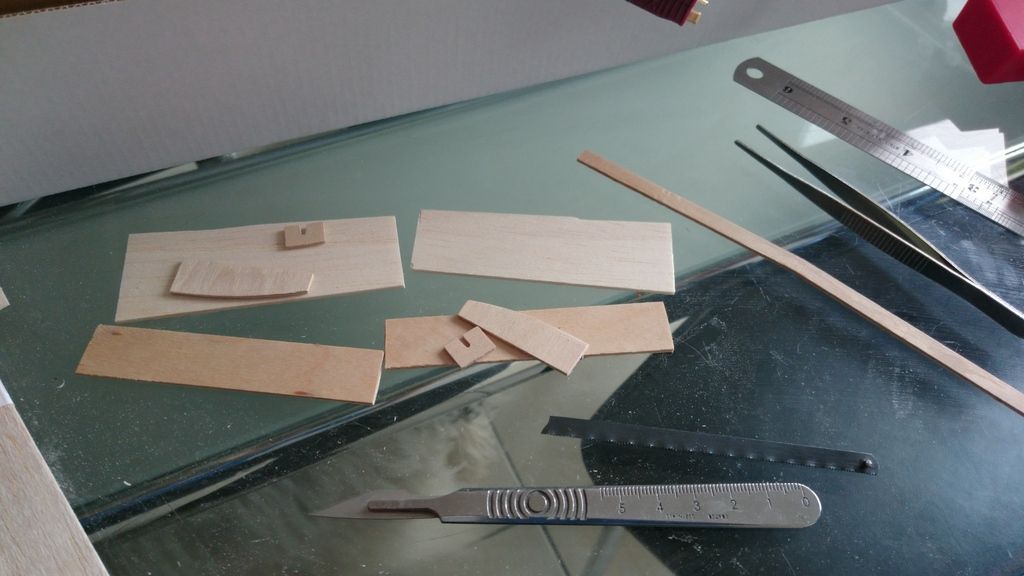
And a little bit of sawing and sanding gave me two light ply "mounts" to fit against Rib 3, two strips of light ply and balsa to recover the base of the wing and support the brace and two pieces to fit to Rib 3 to hold the brace (as it's too short to make it to Rib 3).


I think that was the easy bit...  Actually gluing in the piece to hold the brace is going to be fiddly.  L. Keith has also kindly donated a scrap of light ply from which I can fashion a replacement brace (for the inevitable hard landing).

After this, I still need to see about removing the covering from the tail plane to correctly create the bevel to allow deflection.

Maybe, just maybe, she'll be ready to fly for the spring!  It's only taken approx 49 weeks so far!   :o